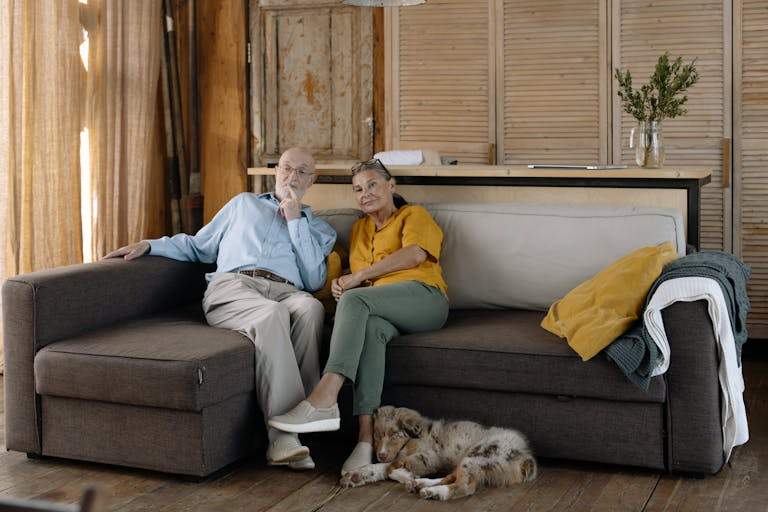
He knew where everything was in that living room. Every table corner. Every lamp cord. Every step up from the sunken conversation area that he’d been navigating for 22 years. Then the knee replacement changed everything. The coffee table he used to step around without thinking became a hazard he hadn’t noticed. The sofa he sank into became something he needed help rising from. The room he knew better than anywhere else in the world suddenly required his full attention to navigate safely.
Living room modifications for seniors are the aging-in-place changes that most people put off longest because the living room doesn’t carry the obvious acute risk of the bathroom, and because rearranging or modifying a space full of chosen furniture and memories can feel like a loss rather than an improvement.
This guide covers 15 specific, practical living room modifications for seniors that reduce fall risk, improve daily function, and support aging-in-place living room design, organized from the simplest and least expensive to the more involved. By the end, you’ll have a clear, prioritized list of easy living room modifications for elderly safety that you can start acting on today, with realistic costs for every change.
What Makes the Living Room a Hidden Fall Risk
The living room is where most seniors spend the majority of their waking hours, and it was almost certainly arranged and furnished without any thought given to aging in place. That combination creates a specific pattern of accumulated, invisible risk.
Unlike bathroom falls, which tend to be discrete events at identifiable high-risk moments, living room injuries tend to result from the slow accumulation of hazards that are present every day but only cause harm when multiple factors align at once: low afternoon light catches a rug edge, a tired body misjudges a table distance, and an unfamiliar piece of furniture has been moved.
The Centers for Disease Control and Prevention (CDC) reports that falls are the leading cause of injury-related death among adults 65 and older in the United States, with approximately 36 million falls occurring each year. Research consistently shows that the home is where most of these falls occur, and the living room, along with the bedroom and bathroom, is one of the most common fall sites.
What makes living room safety for seniors different from other rooms is the variety of hazards present simultaneously. The bathroom has a concentrated, well-documented risk profile. The living room has diffuse risk distributed across furniture arrangement, lighting, flooring, and seating design, none of it acute on its own, but collectively significant.
The good news: Most of the living room modifications that matter most are inexpensive, require no professional help, and can be completed in a single afternoon. The best living room safety tips for elderly people begin with honest observation, not with renovation budgets.
For the complete guide on home safety planning, covering bathroom, bedroom, kitchen, and entry modifications alongside the living room, see our comprehensive guide to aging in place.
15 Living Room Modifications for Seniors
Modification 1: Remove or Fully Secure Every Loose Area Rug
This is the single highest-priority living room modification for seniors, and the one that costs nothing to do right now.
Loose area rugs, rugs with curled edges, and rugs without non-slip backing are the most common trip hazards in American living rooms. The National Institute on Aging (NIA) specifically identifies rug removal as a priority fall prevention step, not because rugs themselves are inherently dangerous, but because they become dangerous the moment an edge lifts, a corner curls, or the rug shifts under a foot.
The honest recommendation: if the rug is not fully secured, remove it. If you want to keep it for warmth, comfort, or aesthetics, secure it completely, with a non-slip backing on the entire underside, double-sided carpet tape on every edge, and a non-slip pad beneath. Test it by attempting to slide it across the floor after securing it. If it moves, it’s not secure.
Cost: $0 for removal. $20–$60 for non-slip backing, pad, and carpet tape if keeping the rug.
What to change in a living room for aging in place often starts here, not with renovation, but with removing what doesn’t belong.
Modification 2: Clear a 36-Inch Walking Path Throughout the Room
Easy living room modifications for elderly safety start with the floor, specifically, with making sure the floor is navigable.
Walk through your living room and measure the clearance between furniture pieces along every path you regularly travel. The universal design standard for accessible pathways is 36 inches minimum, which is enough for comfortable walking with a cane, and sufficient for a walker or wheelchair if needed in the future.
Most living rooms were arranged for visual appeal, not for navigability. Coffee tables placed close to sofas, accent chairs tucked into corners, side tables at arm’s reach. All of these common arrangements narrow pathways in ways that aren’t obvious until you’re navigating with reduced mobility.
Rearrange furniture to achieve 36-inch clearances along every primary pathway. This may mean moving a coffee table further from the sofa, repositioning accent chairs, or eliminating decorative pieces that occupy floor space without serving daily function.
Cost: $0. This takes an afternoon and a tape measure.
Modification 3: Replace or Raise Low Seating
The sofa or chair you’ve sat in for years may be the most insidious fall hazard in your living room, not because of what it is, but because of what it requires you to do to get up from it.
Low seating sofas and chairs with seat heights below 17 inches force a deep hip bend and require significant quadriceps strength and momentum to rise from. For seniors with arthritis, joint replacement history, or lower-limb weakness, rising from low seating becomes progressively harder and eventually requires gripping furniture that isn’t designed to hold body weight.
The target: Primary seating should have a seat height of 17–20 inches from the floor, with firm, sturdy armrests that can support weight during the standing transfer. The armrests are not optional; a sofa without armrests, or with soft padded armrests that compress under weight, does not provide the push-up support that makes rising from the sofa safe.
Solutions:
- Chair leg risers: $15–$50 for a set, adding 2–4 inches of height to existing furniture. Confirm the furniture legs are compatible before purchasing.
- Firm seat cushion insert: A high-density foam seat lift ($30–$80) placed on the existing cushion raises the seating surface without replacing the furniture
- Chair replacement: If the existing sofa or primary chair is too low and cannot be raised adequately, replacing it with furniture at the right height is the most reliable long-term solution
Cost: $15–$80 for risers or cushion inserts. Furniture replacement varies widely.
Modification 4: Add a Stable Side Table or Transfer Surface Near Primary Seating
How to make a living room safe for seniors often involves adding surfaces, not just removing hazards.
The moment of standing from a sofa or chair is the moment of highest fall risk in the living room, and having a stable surface to place a hand on during that transition is meaningfully protective. The surface needs to be at the right height (approximately the same as the armrest, or slightly higher), genuinely stable (not a lightweight accent table that tips under a person’s weight), and positioned close enough to be useful without being in the way.
A small, heavy side table or an end table with substantial legs and a firm base serves this purpose well. Test stability explicitly: press down on the table with your full upper-body weight and push laterally. If it shifts or tips, it is not a transfer surface; it is a fall hazard disguised as furniture.
Cost: $50–$300 for a quality stable side table. This is furniture you may already own; the modification is placement and stability testing, not necessarily purchase.
Modification 5: Secure or Reroute All Electrical and Lamp Cords
Cords crossing living room floors are invisible trip hazards that become visible only at the worst moments.
Extension cords, lamp cords, television cables, and phone chargers routed across any walking path need to be rerouted along baseboards, secured with cord covers, or eliminated. A cord hidden under a rug is doubly dangerous, invisible, and creates a ridge under the rug surface.
Solutions:
- Cord clips and channels: $10–$25, available at hardware stores and Amazon, route cords along baseboards
- Wireless alternatives: Where a corded lamp is the issue, a rechargeable battery lamp eliminates the cord entirely
- Furniture rearrangement: Moving a lamp so its cord runs behind furniture rather than across a path costs nothing
Cost: $10–$50 for most cord management solutions.
Modification 6: Improve Living Room Lighting
Living room safety for seniors is significantly shaped by lighting quality, and living rooms are typically the least well-lit rooms in the home for task and movement purposes.
Most living rooms are designed for ambient lighting – mood, atmosphere, and television viewing – rather than for the navigation and task lighting that makes them safe. Specific lighting modifications for living room modifications for seniors include:
- Ensure every walking path is adequately lit. Stand at each entry point to the room and evaluate whether you can see the floor clearly, including any potential hazards. Add floor lamps or table lamps to dark corners.
- Install rocker-style or illuminated light switches that can be found in the dark. Replace standard toggle switches with illuminated switches ($15–$30 per switch) that glow when the light is off.
- Add motion-activated lighting in the path from the living room to the hallway or bathroom — the path most likely to be navigated in low-light conditions.
- Increase bulb wattage or switch to higher-lumen LED bulbs in primary fixtures. The NIA specifically recommends that older adults increase lighting levels throughout their homes, as the aging eye requires significantly more light to achieve the same visual clarity as a younger eye.
Cost: $15–$200 depending on scope. Motion-activated bulbs and illuminated switches represent the highest immediate impact per dollar.
Modification 7: Anchor or Remove Unstable Decorative Furniture
Accent furniture like decorative plant stands, lightweight side tables, magazine racks, and display shelves that cannot support body weight should be anchored to the wall or removed from primary pathways.
A piece of furniture that looks stable enough for its decorative purpose may fail catastrophically when grabbed for balance during a moment of instability. The scenario of reaching for what appears to be a stable surface and finding it isn’t is among the most common causes of falls in the living room.
Test every piece of furniture within arm’s reach of any pathway by pressing on it firmly with your full weight in multiple directions. Anything that moves, tips, or shifts needs to be either anchored to the wall (using furniture anti-tip straps, originally designed for earthquake safety) or moved out of reach of pathways.
Cost: $15–$40 for furniture anti-tip straps. Available at hardware stores and Amazon.

Modification 8: Install or Adjust Window Treatments for Glare Control
Glare (sunlight reflecting off floors, glass surfaces, or light-colored walls) creates a temporary visual impairment that older eyes recover from significantly more slowly than younger eyes.
The aging eye has reduced ability to adapt quickly between bright and dim areas, making glare a genuine fall risk trigger. In living rooms with large windows, afternoon glare hitting a light-colored floor can create a temporary blinding effect at exactly the wrong moment.
Solutions:
- Adjustable blinds or shades that can reduce direct sunlight at peak glare times
- Non-reflective area rugs or floor coverings in glare-prone areas
- Window film (applied directly to glass) that reduces glare without eliminating daylight
Cost: $20–$200 depending on window treatment choice.
Modification 9: Use High-Contrast Color Cues at Transition Points
Aging in place living room design uses color contrast not for decoration but as a genuine visual safety tool.
The aging eye loses contrast sensitivity, the ability to distinguish between surfaces of similar color or brightness. A light-colored step down into a sunken living area, a clear glass coffee table edge, or a white threshold strip between two rooms can all become invisible to a senior with reduced contrast sensitivity.
Solutions:
- Brightly colored or high-contrast tape or edge strips on any change in floor level, step up or down, or threshold
- A dark-colored rug edge adjacent to light flooring at a transition point
- Colored tape on glass furniture edges (available in clear-with-color options that are visible without being visually disruptive)
Cost: $10–$40 for safety edge tape and contrast strips.
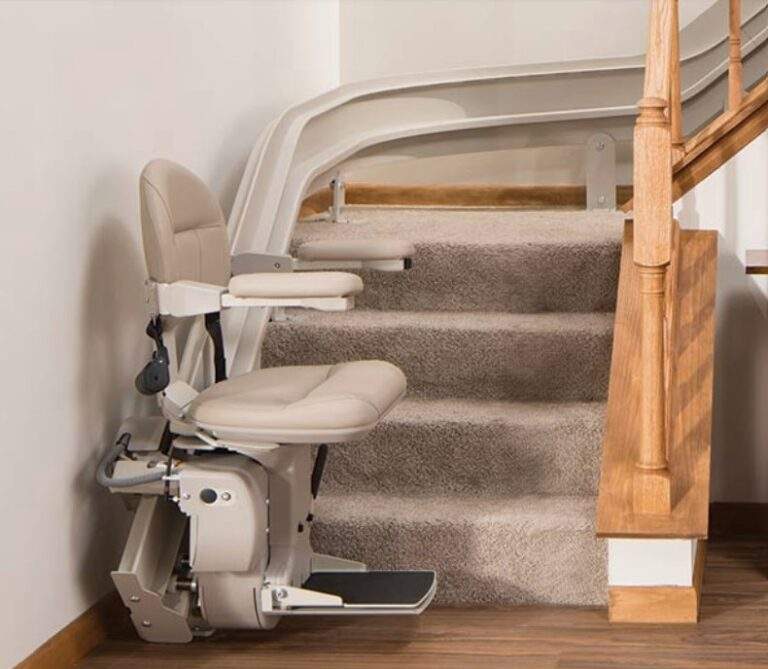
Modification 10: Address Steps and Level Changes Within the Living Room
Sunken living rooms, split-level designs, and even single steps between rooms are among the highest-fall-risk features in a living room, and among the most commonly underestimated.
A single 6-inch step down into a conversation pit, a single riser connecting two living areas, or even a slightly raised threshold between rooms can cause a fall if navigated without full visual attention. These architectural features were designed for visual interest, not for navigability.
Solutions:
- Install a sturdy handrail on any step change, even a single step. A railing that runs the full approach to a step and continues past it gives the user something to hold during the transition from level walking to step descent.
- Apply high-contrast non-slip tread to any step surface, both for traction and visual clarity
- Increase lighting at the step specifically, a step that is well-lit in daylight may be invisible in evening light
Cost: $150–$600 for a handrail installation. $15–$40 for non-slip treads. Lighting: $20–$100.
If a level change cannot be safely navigated, creating a pathway that bypasses it entirely may be the safest solution. This is a modification worth discussing with a CAPS professional.
Modification 11: Position a Medical Alert Device in the Living Room
The living room is where seniors spend most of their waking hours, and it is where a fall or medical event is most likely to occur during the day.
A medical alert device – a wearable pendant or wristband that connects to a monitoring service – should be worn during all waking hours, including in the living room. Many seniors wear their device in the bedroom and bathroom but remove it when “comfortable” in the living room. This is the most common gap in medical alert system use.
For living room-specific considerations:
- Ensure the base unit (for in-home systems) is positioned to provide clear two-way audio coverage of the living room
- For GPS-enabled wearable systems, confirm the device functions reliably throughout the home, not just near the base unit
The best living room safety tips for elderly people always include wearable emergency communication, because a fallen person in the living room who cannot reach a phone faces the same consequences as one in the bathroom.
For guidance on selecting the right medical alert system for full-home coverage, see our comparison of [medical alert systems for seniors].
Cost: $20–$60/month for monitored systems.
Modification 12: Relocate Frequently Used Items to Accessible Heights
Best living room safety tips for elderly people include eliminating the overhead reaching and floor-level bending that create balance hazards during daily activities.
Remote controls stored on a high shelf. Reading glasses in a low drawer. Medications on a high bookshelf. Books and magazines at floor level. Each of these daily retrieval actions involves a postural change, reaching up, bending down, that challenges balance in ways that flat walking does not.
Audit where you keep the items you reach for daily in the living room. Relocate everything to a range between waist and shoulder height. This is a zero-cost modification that takes one organizational session.
Cost: $0.
Modification 13: Install Grab Bars or Handrails at Key Transition Points
Grab bars are not exclusively a bathroom feature; they are an appropriate and effective addition to any living room area where transitions between positions or surfaces are regularly made.
Specific living room locations where a grab bar adds meaningful value:
- Adjacent to the primary sofa or chair — a wall-mounted grab bar at armrest height on the wall beside the seating provides a stable push-up surface that no piece of furniture can fully replicate
- At a step or level change — a wall-mounted bar at the approach to any step, in addition to a railing
- At a doorway or entry, a vertical bar on the doorframe at the primary living room entry provides stability during the directional change of entering and exiting
All grab bars must be anchored to wall studs or solid blocking and never to drywall alone. A bar anchored to drywall will pull free under body weight. For installation guidance, see our guide to the best grab bars for seniors.
Cost: $75–$200 per bar, professionally installed.
Modification 14: Create a Consistent Seating Height Policy for All Living Room Chairs
The practical implication of seating height for living room safety for seniors extends to every seat in the room, not just the primary sofa.
Many living rooms have a mix of seating heights: the main sofa at one height, accent chairs lower, and an armless reading chair at another height entirely. For a senior who needs consistent seating height for safe transfers, this variety creates a daily decision-making challenge, and the lowest seat in the room is always the highest fall risk.
The action: Evaluate every seat in the living room at which you regularly sit. Apply risers, firm cushion inserts, or replacement to bring all primary seating to a consistent 17–20 inch height with armrests. Reserve low-profile seating (like a low armchair or floor cushion) for guests only or remove it entirely.
Cost: $15–$80 per seat for risers or cushion inserts.
Modification 15: Create a Clear, Direct Path to the Bathroom and Exits
The final living room modification is a systems-level one: ensuring that the path from the living room to the bathroom, to the front door, and to any exit is clear, well-lit, and navigable at any time of day or night.
Map every path you take from the living room to the kitchen, to the bathroom, to the front door, to the bedroom. Walk each one at your usual pace. Then walk each one in reduced light. Note every place where you slow down, reach for a wall, or feel uncertain.
Aging in place living room design ideas for seniors at their best create a home where movement is always confident, where you never have to think carefully about a route you travel a dozen times a day.
The modifications that address each of those uncertain points, lighting, clear pathways, stable surfaces, and grab bars at transitions, are drawn from the modifications above. This final step is the audit that identifies which of the 15 modifications matter most for your specific living room and your specific movement patterns.
Cost: $0 for the audit. Modification costs depend on what the audit reveals.
What to Do With This Information: Practical Next Steps
- Walk through your living room with fresh eyes today. Take a notepad and physically walk every path you use daily, looking specifically for: loose rugs, cord crossings, low seating without armrests, narrow pathways, and areas of poor lighting. Write down what you find. This inventory is your modification priority list.
- Remove all unsecured rugs immediately. This is the zero-cost, highest-impact first action. Do it before you do anything else. Determine whether to re-secure or permanently remove each rug after the rest of the assessment is complete.
- Test every piece of furniture you touch during normal movement – every surface you might grab for balance – by pushing on it firmly in multiple directions. Flag anything that moves. This takes 10 minutes and identifies hazards that are impossible to see without testing.
- Address seating height and lighting as your first paid modifications. Chair risers and LED lighting upgrades are inexpensive, immediately impactful, and completely reversible if you change your mind. These two changes alone address a significant proportion of living room fall risk.
- Schedule a professional OT assessment if you’ve had any near-falls or falls in the living room. A licensed occupational therapist can evaluate your living room in the context of your specific physical abilities and produce a prioritized modification plan. Ask your physician for a referral or contact your local Area Agency on Aging.
- Use our complete home assessment tool to evaluate every room together. Our aging-in-place home assessment guide walks through every room systematically, so the living room modifications you make fit into a coherent whole-home safety plan.
A Note for Family Members and Caregivers
The living room is the room where a parent’s daily life is most visible, and it’s often where family members first notice changes that the parent has adapted to without recognizing as safety concerns. Watch specifically for: your parent pausing before getting up from the sofa, reaching for walls or furniture during normal movement, or navigating the room along non-direct paths that avoid certain areas.
These behavioral adaptations tell you where the modification needs are better than any checklist. A parent who always goes around the coffee table rather than past it has already assessed that passing it feels risky, even if they wouldn’t describe it that way.
The most effective approach for the living room is to do the modifications together with furniture arrangement decisions; in particular, they are more likely to be accepted and maintained when the parent is involved in making them.
For broader guidance on supporting a parent through home safety planning conversations, see our resources on [building a care and support system].
The Bottom Line on Living Room Modifications for Seniors
Living room modifications for seniors deliver their greatest value at the lowest cost: rug removal, cord management, lighting improvements, and seating height adjustment are changes that most people can complete in a weekend for under $200, and that address the majority of living room fall risk.
The modifications that require professional help, like grab bars at transition points, handrails at steps, and structural pathway changes, are fewer, more targeted, and easier to identify once you’ve completed the basic audit.
The most important thing about aging in place living room design ideas for seniors is that they start with observation, not renovation. Walk through your room. Test your furniture. Walk it in the dark. What you find in that hour will tell you exactly what matters most in your specific living room.
Your next step: If you’re ready to evaluate the living room as part of a complete home safety plan, download our free Aging in Place Planning Checklist. It covers every room, every modification category, and gives you a complete prioritized action list to work from.
The living room is where you spend most of your waking hours, so making it safe is one of the most direct investments in the daily quality of life you want to protect.